Crop: Lillium
Scientific name : Lilium michiganense
Common / Local Name :
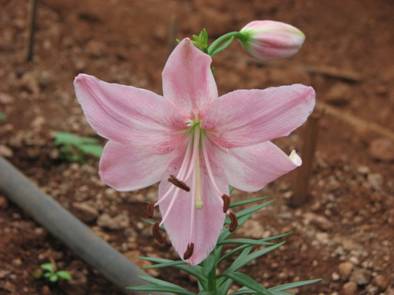
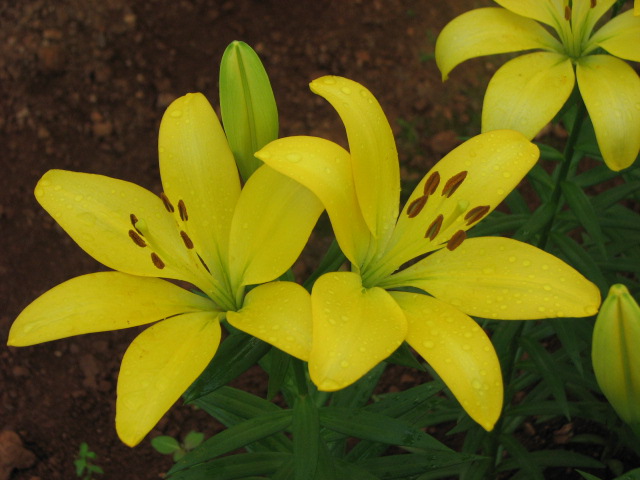
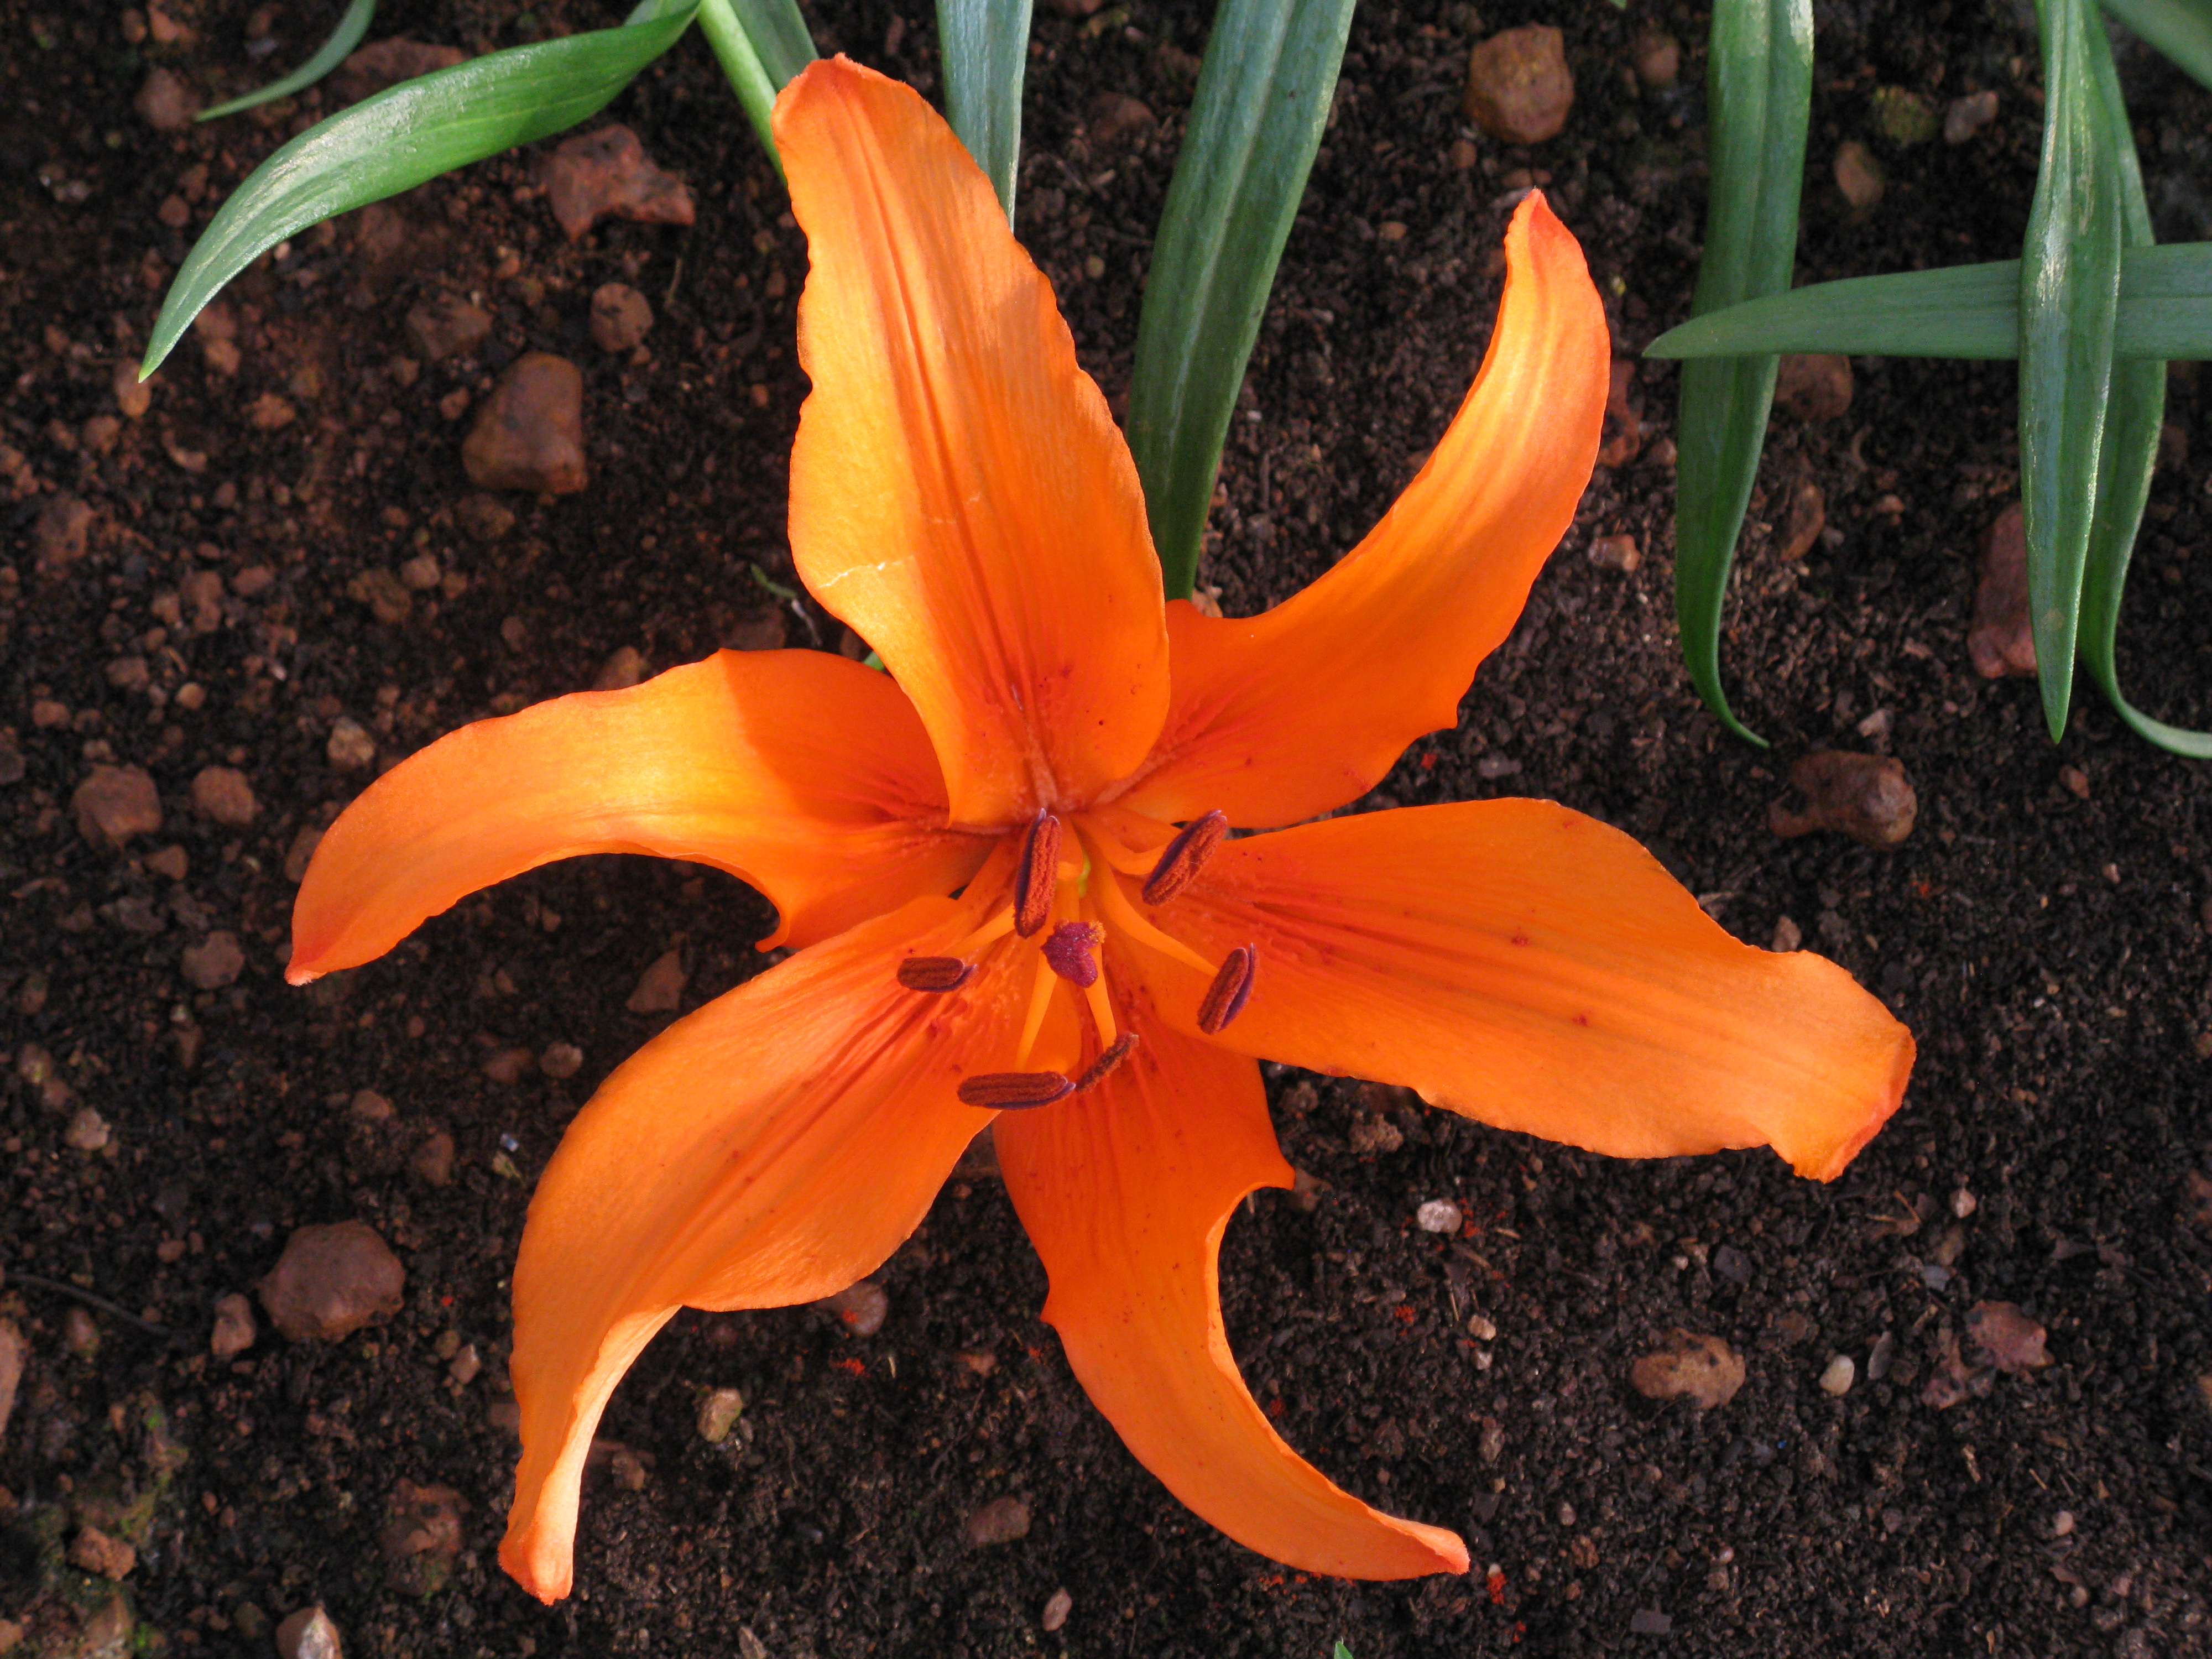
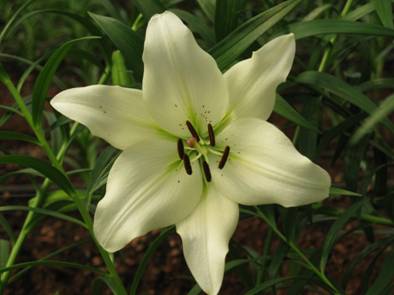
The genus Lilium (Lilium michiganense) are herbaceous flowering plants normally growing from bulbs, comprising of genus of about 110 species in the lily family Liliaceae. It is native from the northern temperate regions. The species in this genus are the true lilies while the other plants with lily in the common name are related to the other groups of plants.
Lilies are usually erect leafy stemmed herbs. The majority of species form tunic less scaly underground bulbs from which they gives flowers. The large flowers have three petals along with three petals like sepals.
BEDDING MEDIA
1. SOIL: The soil; used for cultivation of lilies, has good structure particularly the top layers and is also kept well drained during the entire growing period. Maintaining the correct pH of the soil plays a major role in the root development & uptake of nutrients. It is advisable to maintain a pH of6 to 7 for the Asiatic & longiflorum hybrid groups and a pH of 5.5 to 6.5 for the oriental hybrids.
The Chlorine in the soil should not exceed 1.5 mmol/lit.
Bed composition:
Red soil : 60%
FYM : 30%
Sand : 10%
Rice husk : As per requirement
2. COCO PEAT:
Coco peat requirement- 19 kg/m2
BED PREPERATION:-
Bed layout: For soil and coco peat media.
PLANTING DEPTH:
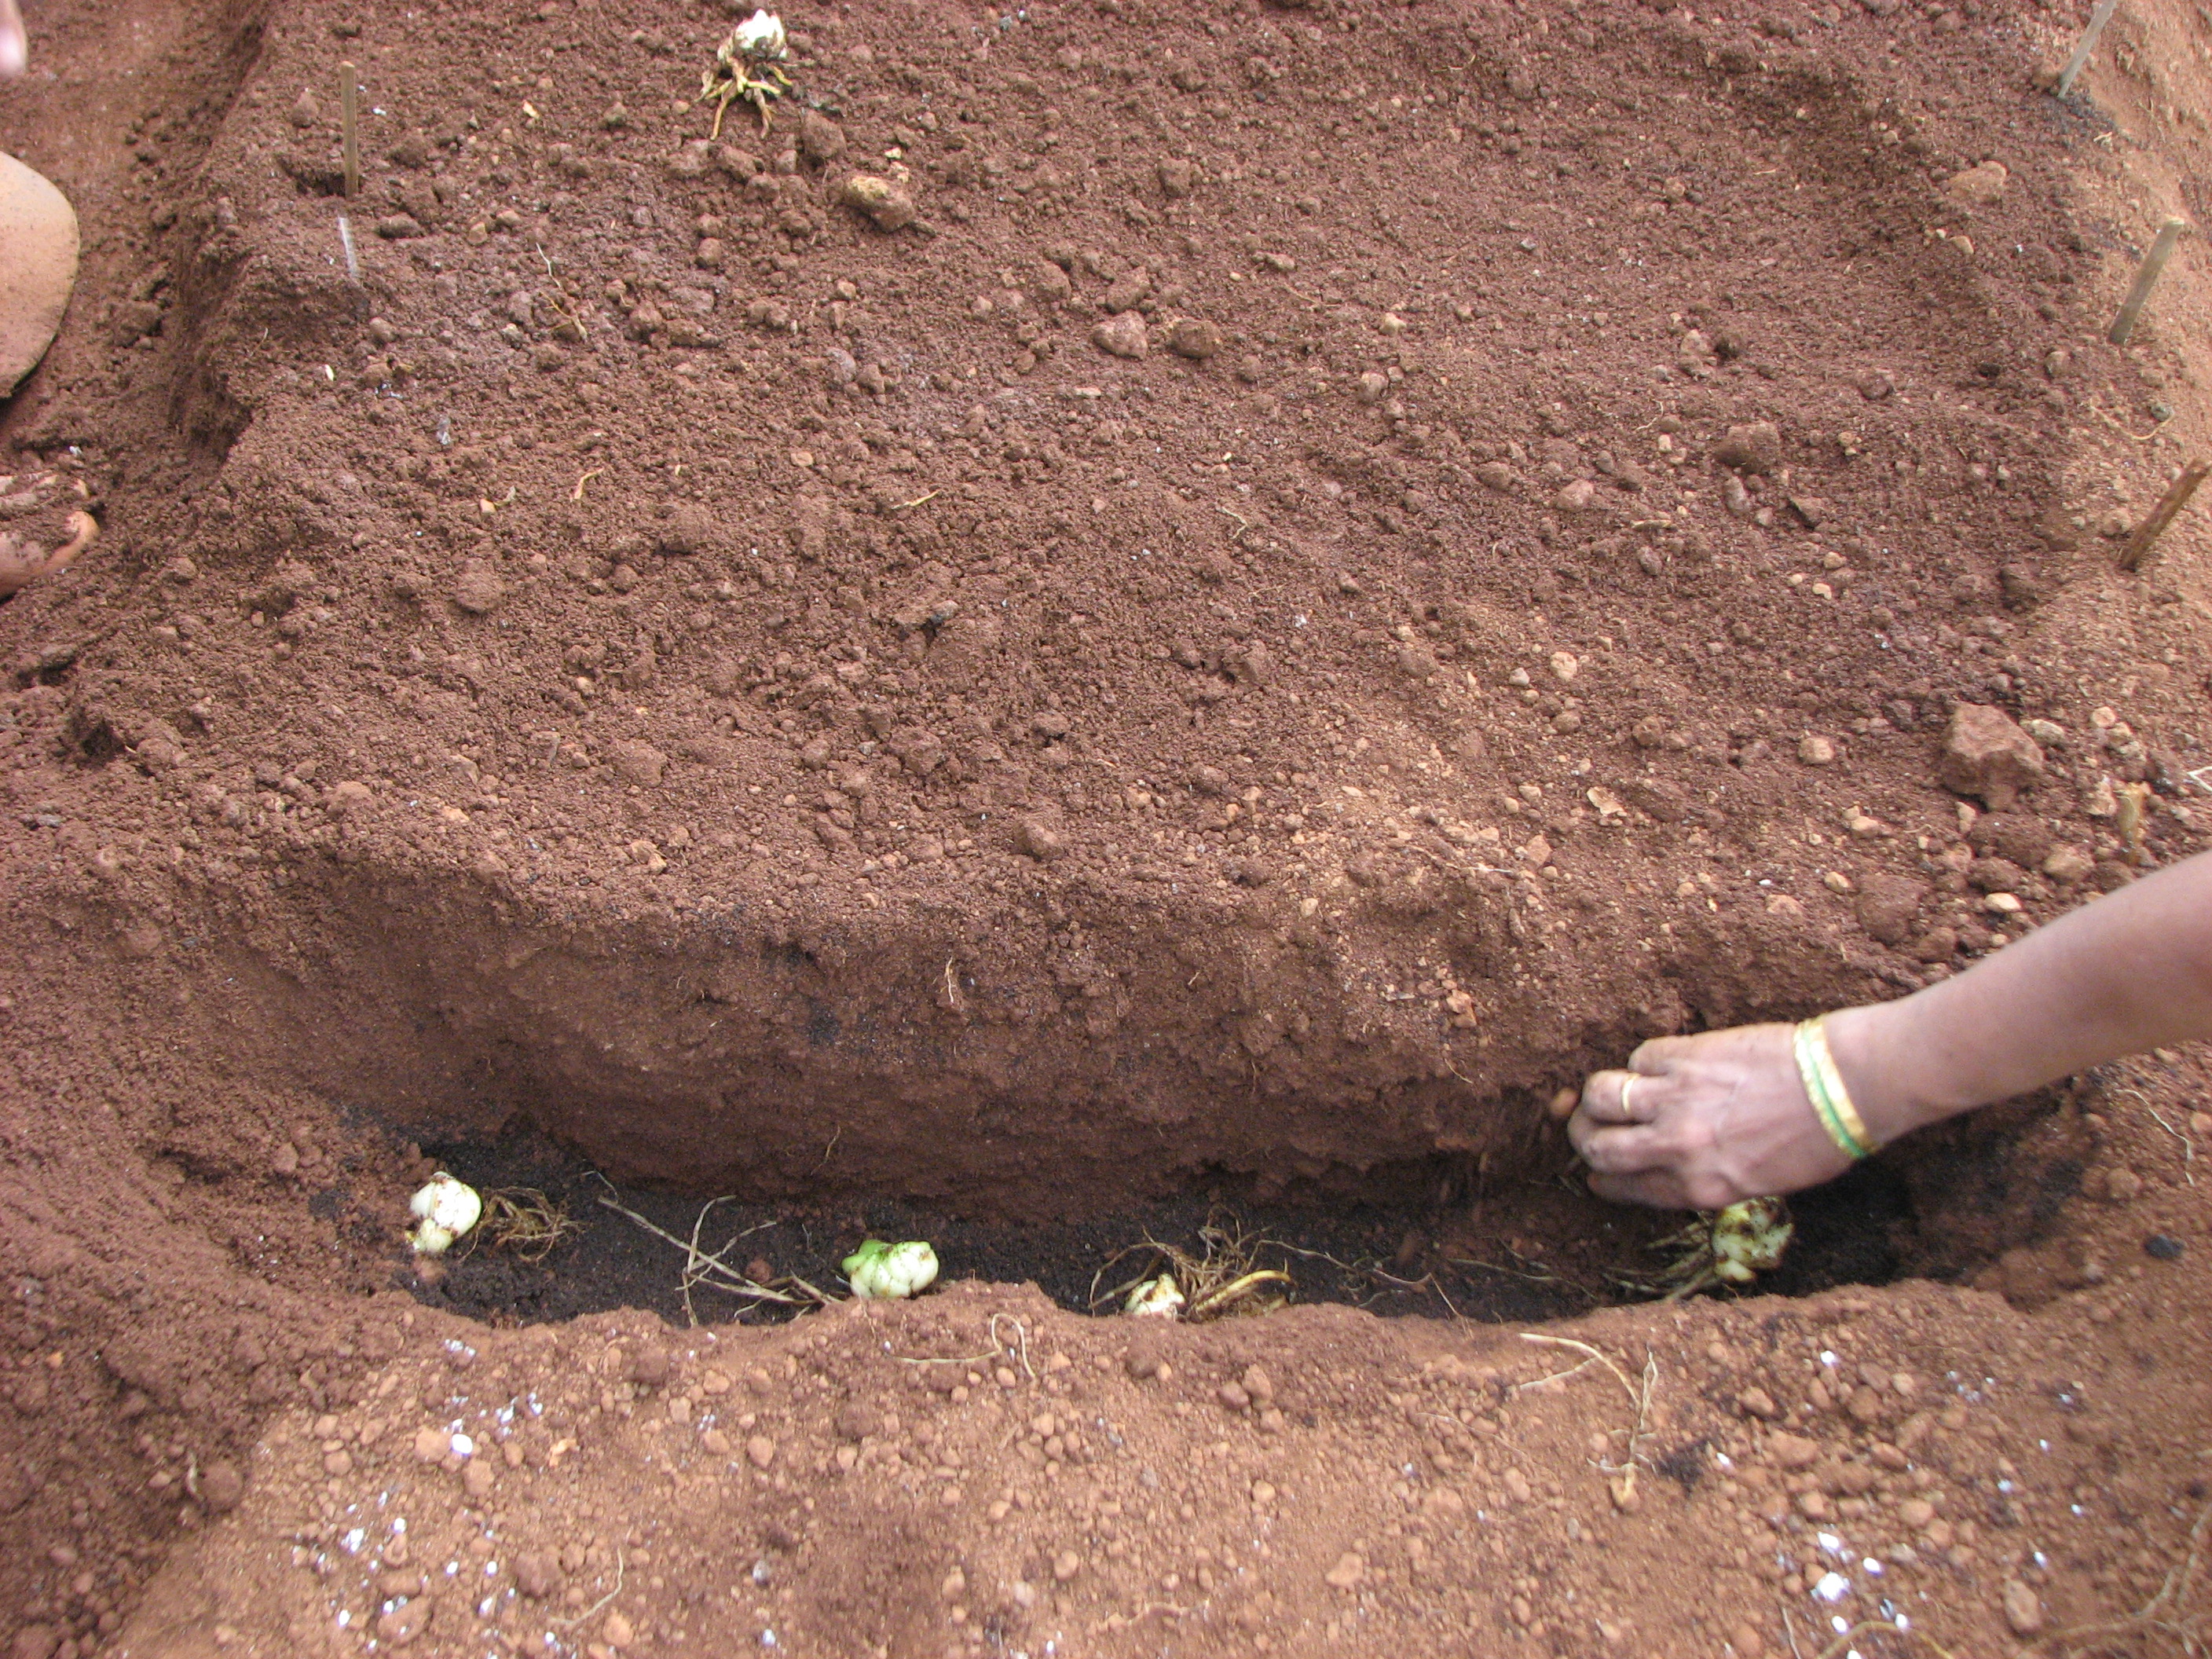
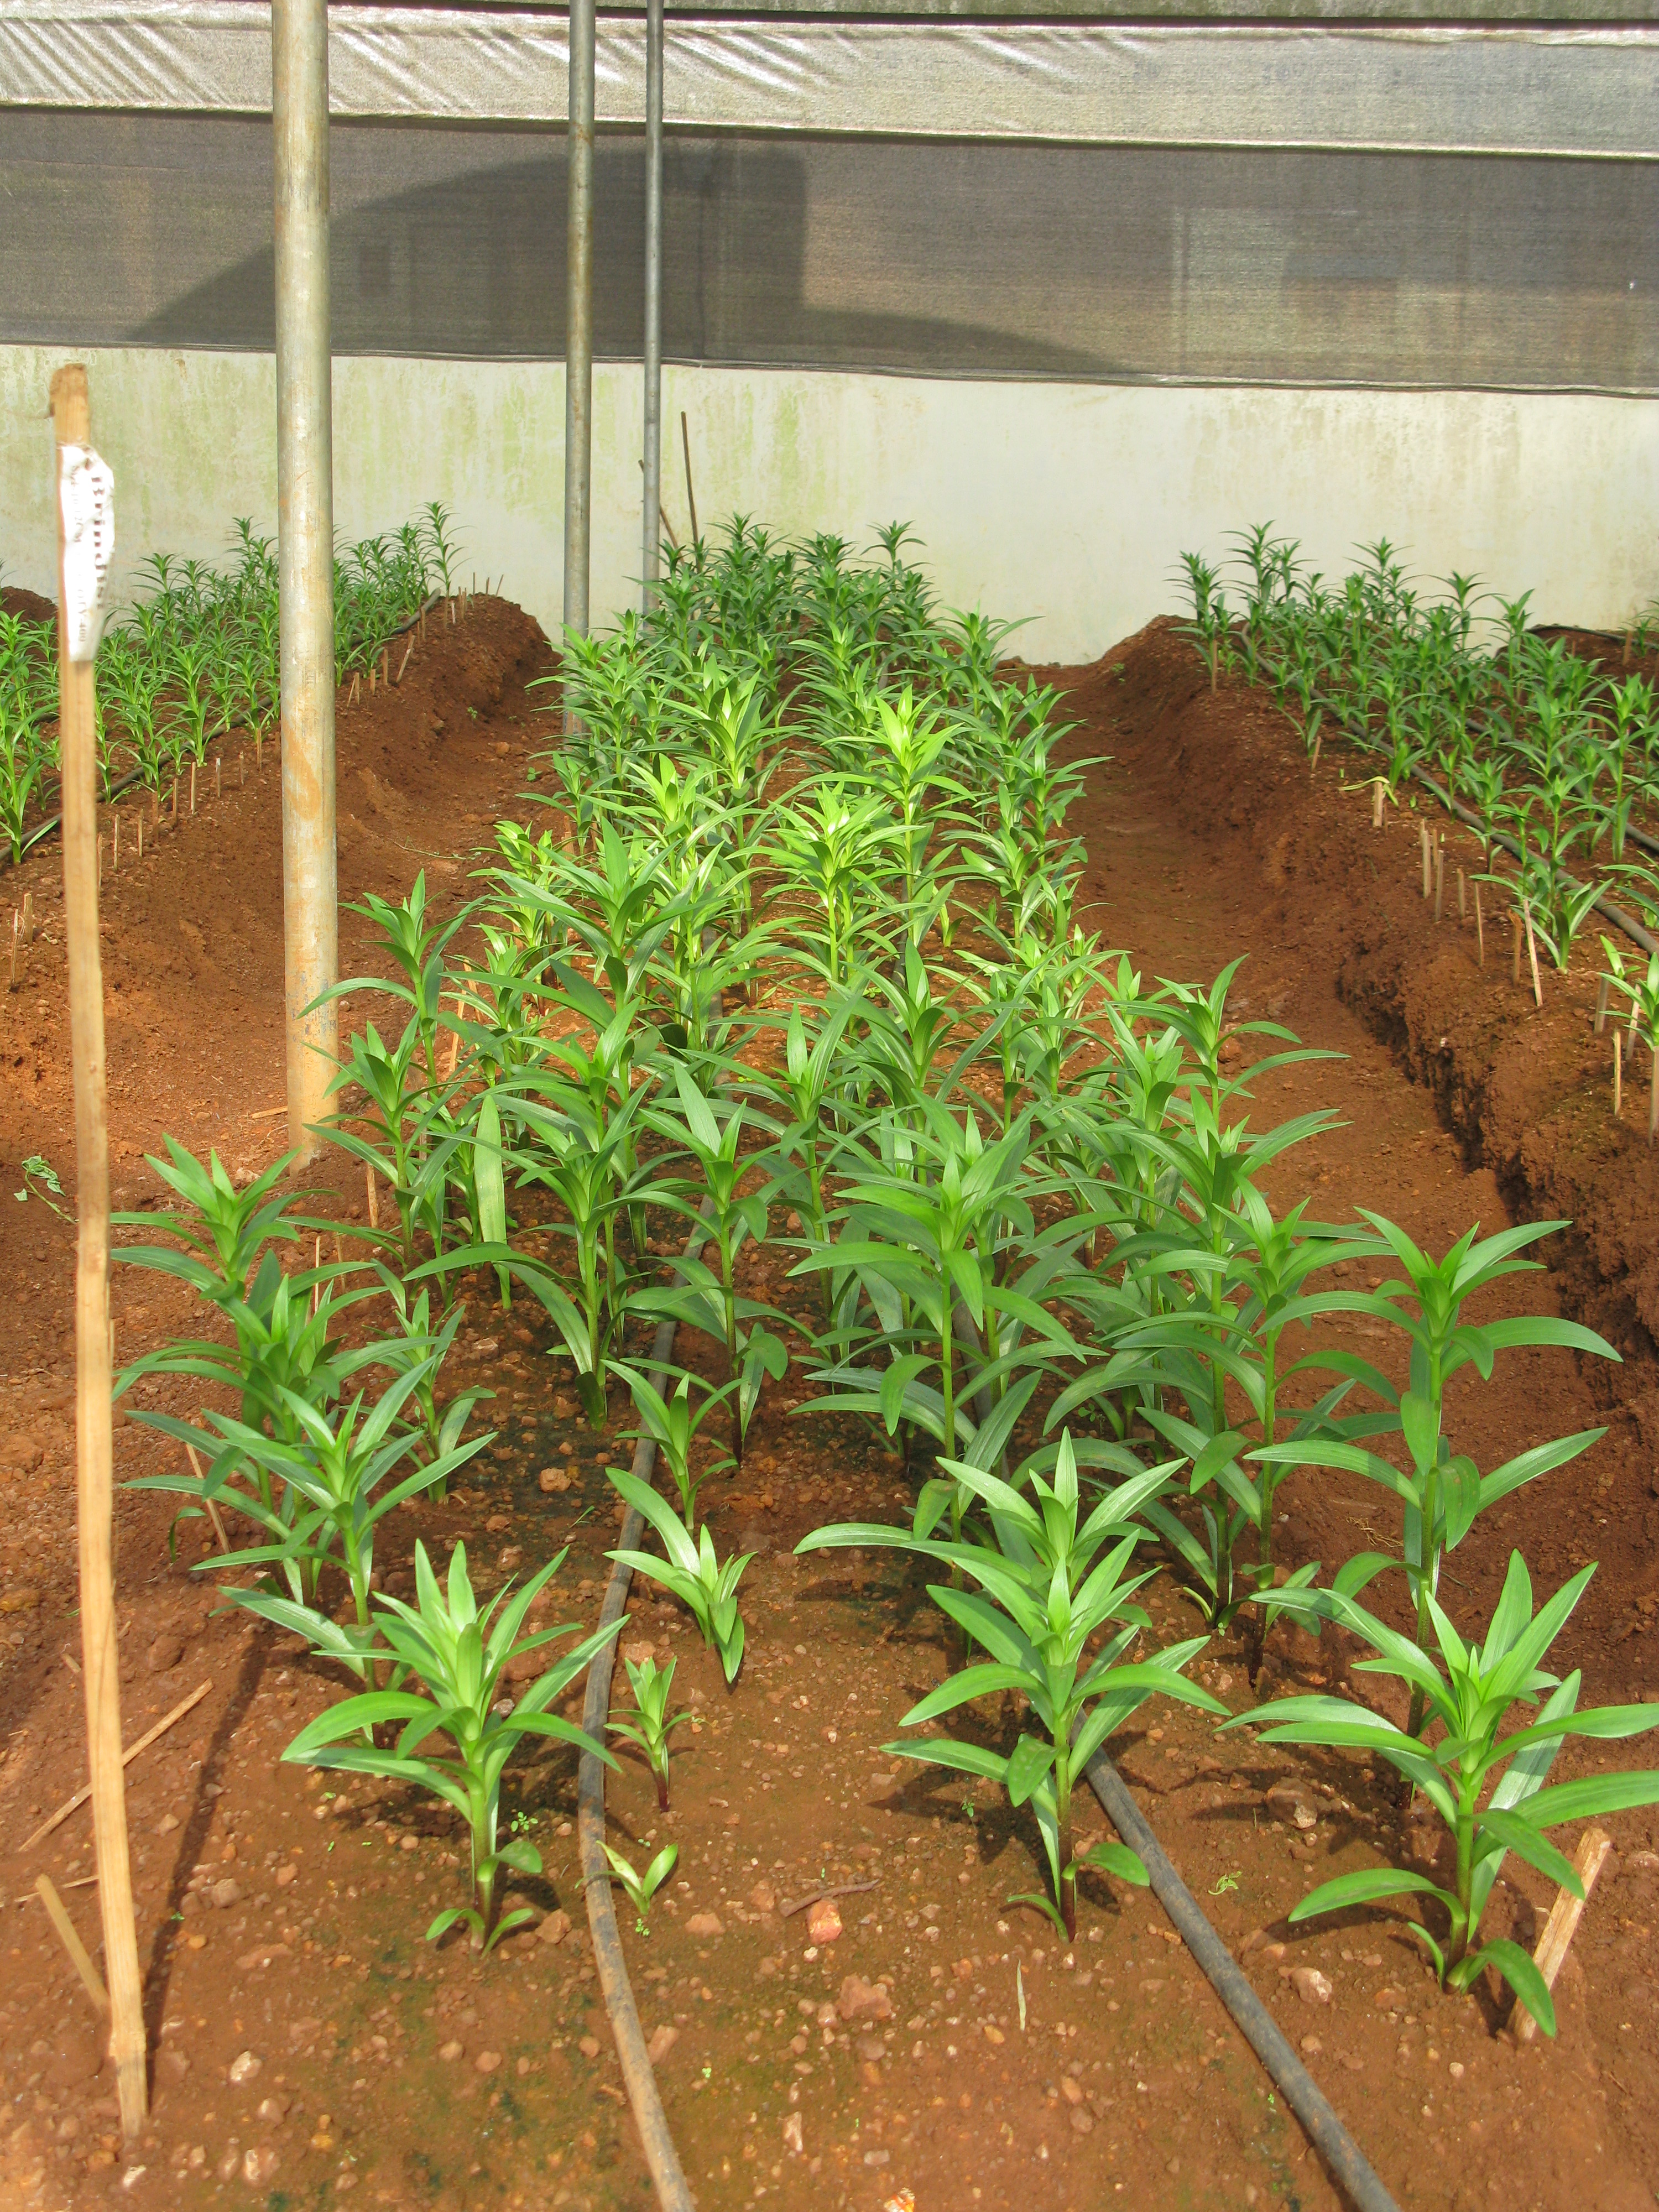
Lilium bulbs should initially be planted at a depth of 6 inches. After planting and irrigation the soil will decline about an inch. Height of the bulb is approx one inch, which leaves four inches of soil on top of the bulb. This is sufficient soil in which the stem roots can develop. Shallow planting will result in poor stem root development and hence one compromise on the quality of the flower. Planting depth varies according to the size of the bulb. Generally bulb should be planted to the depth of three times more than the diameter of the bulb.
PLANTING DENSITY:
Bulb Size |
Bulbs/m2 |
Planting Distance (cm) |
8 -10 cm |
49 |
15Х15 |
10 - 12 cm |
42 |
16Х15 |
12 - 14 cm |
36 |
16Х 18 |
14 - 16 cm |
36 |
16Х18 |
 Brindisii
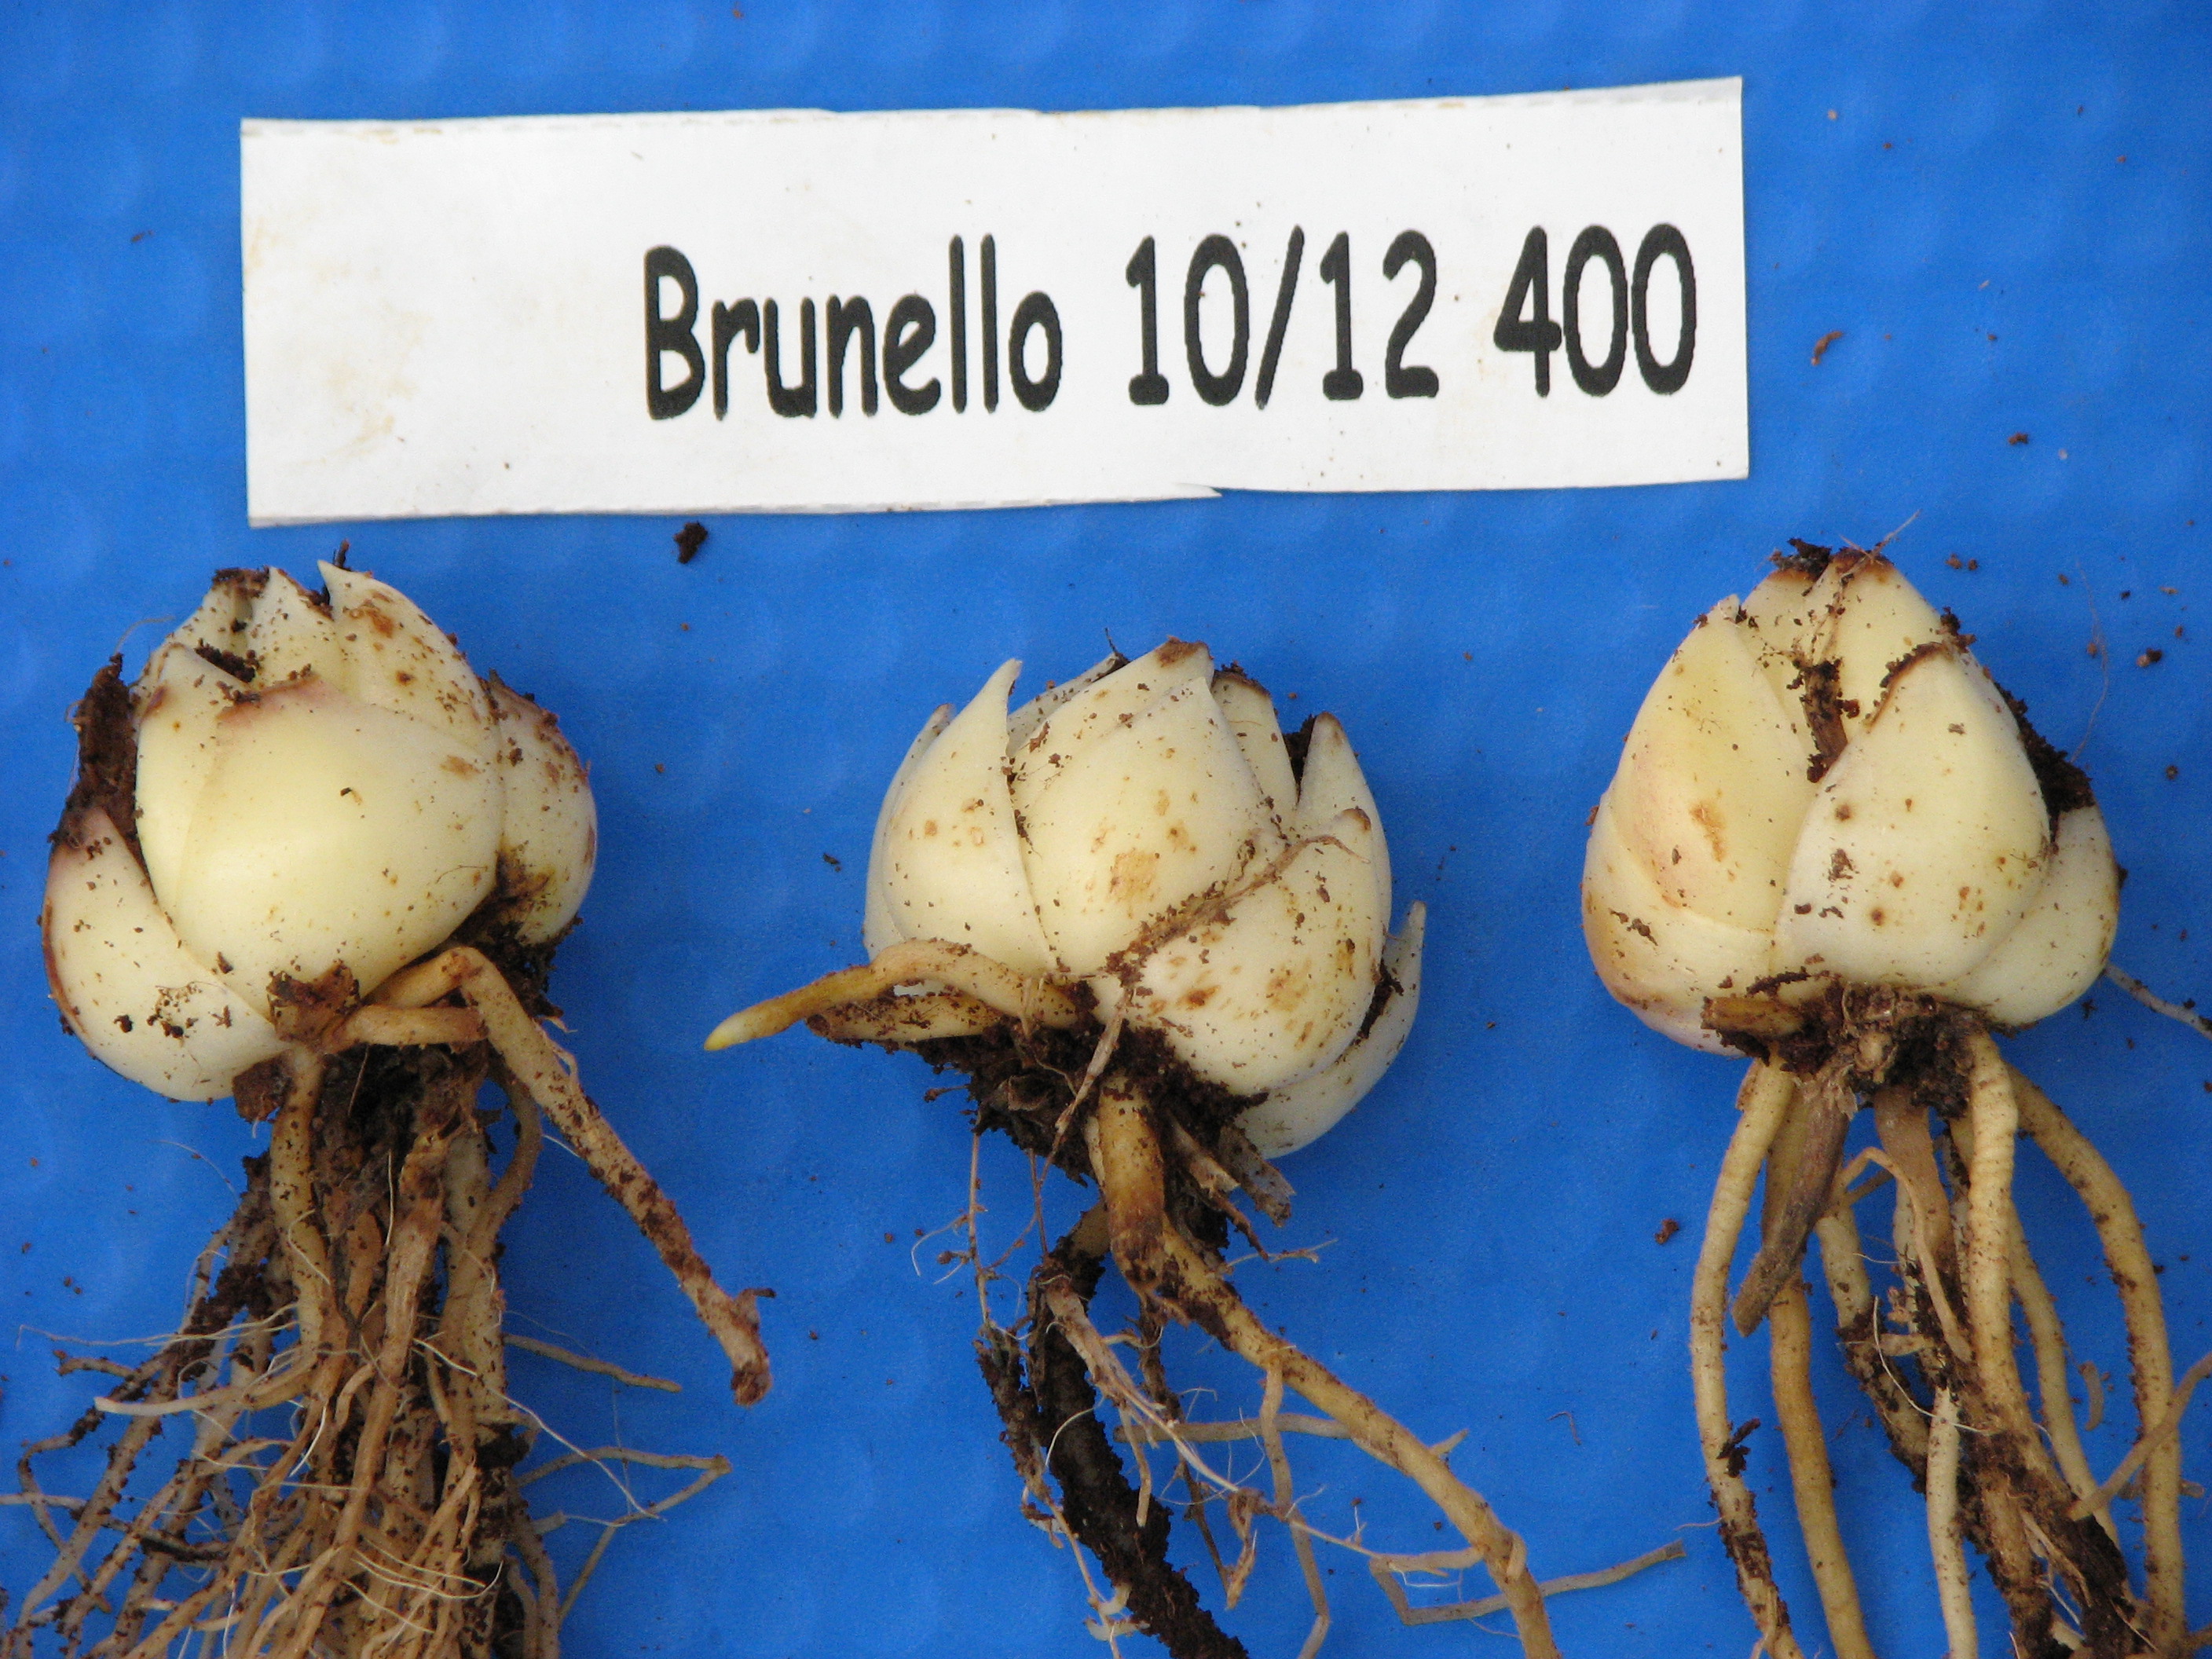
 Brunello
 Courier
Serrada
FERTIGATION:
1. Soil: Since lilium is a bulbous crop, most of its nutrients are already present in the bulb itself. Lilium is a very salt sensitive crop and therefore one should take care with applying fertilizers. Especially in the first three weeks when the rooting takes place, no additional fertilizers are required. Good root development is important at this stage. It is however advisable to apply 12:61:00@ 2kg/100m2 at least one week before plantation.
- Three weeks after plantation: - Calcium Nitrate @ 1 kg/100m2
- Six week after plantation : - Potassium nitrate@ 1 kg/100m2
If plants are not strong enough during growing period due to Nitrogen deficiency then a top dressing of Ammonium Nitrate@ 1 kg/100 m2 can be applied up to three weeks before harvesting.
2. Nutrient Standards for Coco peat Media:
Nutrients |
Standards In mmol/lit |
||
Asiatic Hybrids |
Oriental Hybrids |
||
Nitrogen |
N=(NO3,NH4) |
2.0 |
3.0 |
Phosphate |
P |
0.15 |
0.15 |
Potash |
K |
1.0 |
1.3 |
Calcium |
Ca |
1.5 |
1.8 |
Magnesium |
Mg |
0.8 |
1.0 |
Sulphate |
SO4 |
1.5 |
1.5 |
Fertilizer requirement in kg / 1000 lit of water for A & B tank: -
'A' Tank
Fertilizer Grade |
Fertilizer Requirement |
|
Asiatic |
Oriental |
|
Calcium Nitrate |
69 |
76 |
Ammonium Nitrate |
9 |
7 |
Potassium nitrate |
22 |
17 |
'B' Tank
Fertilizer Grade |
Fertilizer Requirement |
|
Asiatic |
Oriental |
|
Potassium Nitrate |
51 |
48 |
Magnesium Sulphate |
49 |
52 |
Borax |
0.5 |
0.5 |
1) Iron (Fe):
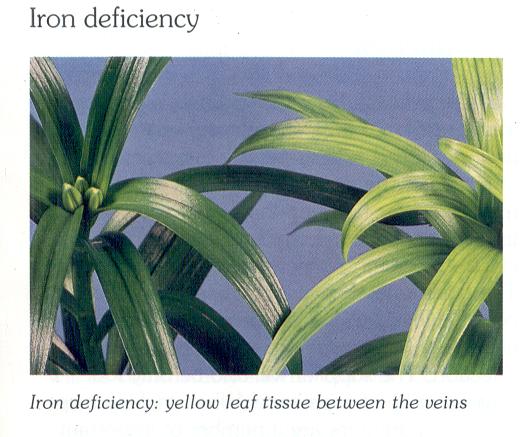
Symptoms:
The leaf tissue between the veins of young leaves becomes yellowish-green, particularly in plants with rapid growth. The greater the iron deficiency the more yellow plant will become.
Control:
Soil should be well drained with low pH level
-
Chelated- Fe should be applied 2-3 gm/m2 before planting & maximum 2 gm per m2 after planting.
2) Nitrogen (N):
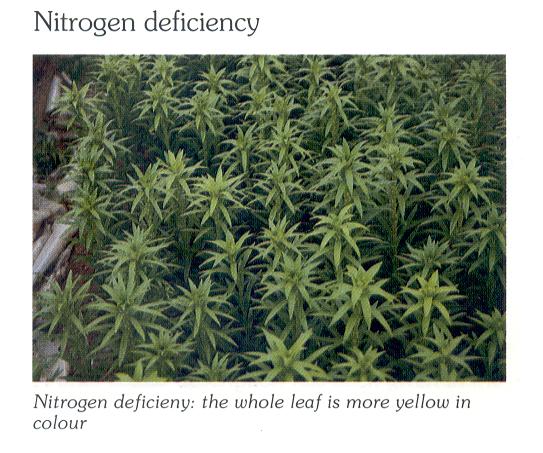
Symptoms:
The whole leaf becomes lighter in colour & this is often more noticeable when plants are about to bloom. The plant often seems rather slight in appearance. Soil with a low nitrogen level produce a crop with stems which are lighter in weight & have less flower buds. The foliage in the vase will turn yellow more quickly.
Control:
-
Always apply sufficient quantities of nitrogen, preferably based on the results of soil sample.
-
If the nitrogen deficiency is diagnosed during cultivation apply an additional rapid action nitrogen fertilizer. However, bear the risk of leaf scorch in mind during this procedure & make sure the crop is always washed off thoroughly.
ABNORMALITIES:
1. Leaf Scorch:
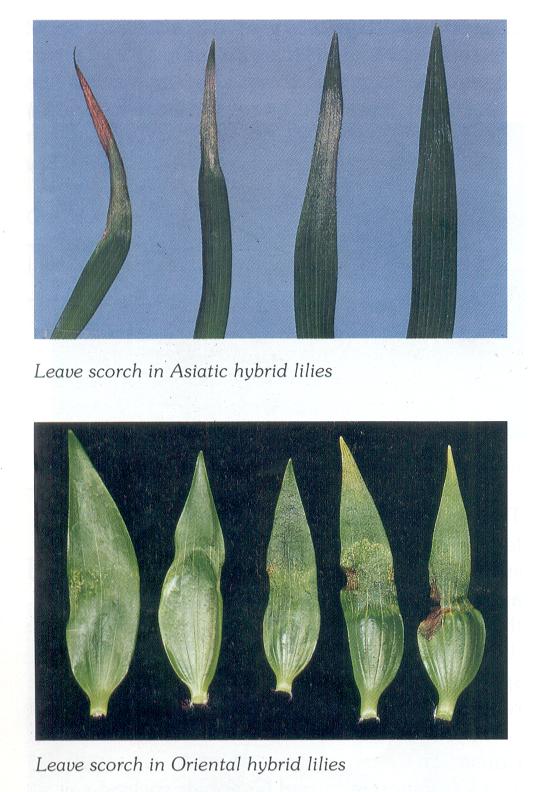
Cause:
Leaf scorch occurs when there is a disturbance in the balance between absorption & evaporation of water. This is the result of inadequate absorption or evaporation which causes a calcium deficiency in the cells of the youngest leaves. Cells are destroyed & die. A sudden change in the relative humidity inside the greenhouse can affect this process related to poor root system & high salt level in the soil. Large bulbs are more susceptible than smaller one.
Control:
- Disease & pest which could damage the roots should be controlled effectively.
- Soil should be moistened before planting.
- It is better not to use susceptible varieties but if this can not be avoided do not use a larger Bulbs as these are extra sensitive.
- Plant bulbs with a good root system.
- Plant to an adequate depth i.e. allow 6-10cm of soil on top of the bulb.
- Prevent large differences in greenhouse temperature & air humidity levels during period of increased susceptibility. Try to maintain RH level of approx. 75%.
- Rapid growth must be prevented.
- Ensure that plants maintain even transpiration & avoid excess transpiration by shading.
2. Bud drop & bud desiccation:-
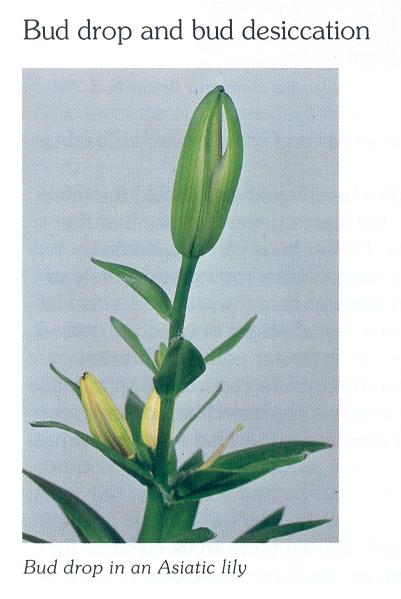
Cause:
Bud drop occurs when plants receive insufficient light. In light deficient conditions the stamens in the bud produce ethylene causing the bud to abort. There is an increased risk of bud desiccation if rooting conditions are poor, e.g. too dry soil.
Control:
- Do not allow; varieties susceptible to bud drop to grow in poor light conditions.
- To prevent bud desiccation bulbs should be allowed to dry out during planting. Ensure that the bulbs root well & grow in the most favourable conditions possible particularly as far as lighting & transpiration are concerned.
Aphids
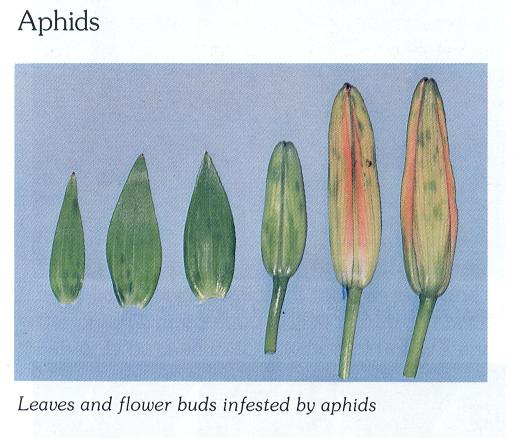
Symptoms
Upper leaves are curled & deformed. Green spots on young buds; flower could be deformed & remain partially green.
Control Measure
Weed control, spray with chloropyriphos @ 2ml per lit.
OR
Nuvan @ 1ml per lit.
Penicillium
Symptoms
During storage; rotting spots covered first with white & later on with fluffy bluish green fungus are visible on the scales. Affected bulbs produce plants with retarded growth.
Control Measure
Store the bulbs at the lowest recommended temp. Keep soil moist. Remove infected scales.
Bulbs & Scale rot
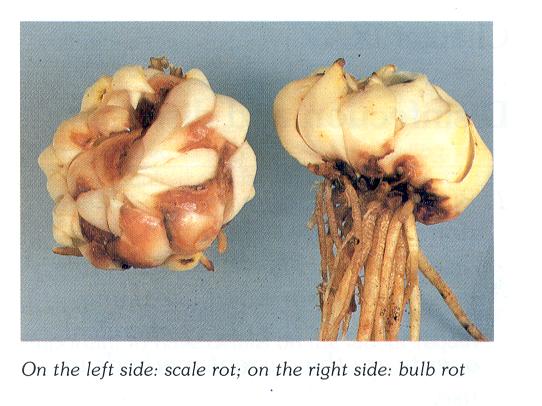
Symptoms
Underground brown spots on top & side of bulb. Later on start to rot. Retarded growth. Pale foliage.
Control
Soil disinfection. Maintain lowest possible soil & greenhouse temp. Remove infected scales.
Fusarium stem disease
Symptoms
Premature yellowing of the lower leaves which turn brown & then drops to orange to dark brown spots on stem.
Control
Soil disinfection. Maintain lowest possible soil & green house temp.
Rhizoctonia
Symptoms
Sunken light brown spots on leaves & first leaves above ground rotted. Wilted & leaving brown scars on stem.
Control
Keep soil temp below 15°C. Soil disinfection before planting bulbs with food root system.
Phytophthora
Symptoms
Retarded growth, wilting of foliage, stem base- dark green to dark brown in color spreading upwards, leaves become yellow.
Control
Soil disinfection. Ensure that soil is well drained. Maintain soil temp during summer months.
Pythium
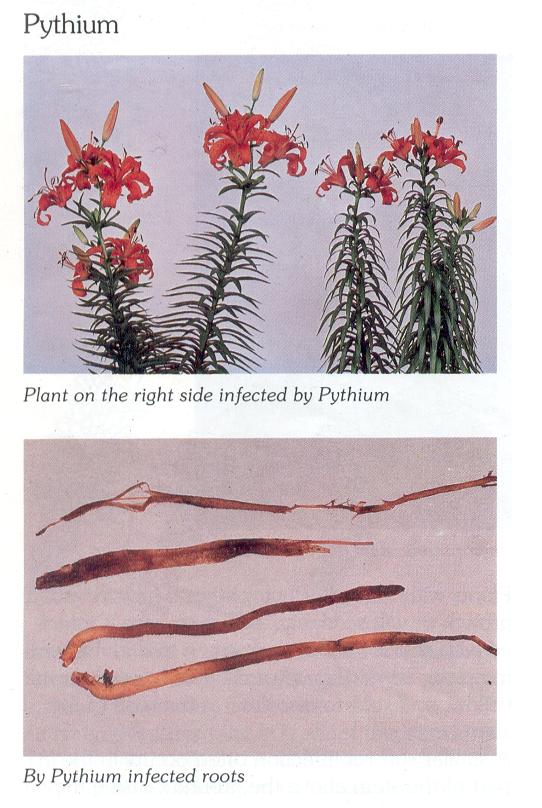
Symptoms
Plants remain short, pale foliage; flower bud desiccation & bud drop takes place. Smaller flowers. Transparent light brown rotting spots on bulbs. Stem roots are completely limpy & watery.
Control
Soil disinfection. Maintain a low soil temp. No excessive water soil drenching of Ridomil @2.5gm/lit.
Botrytis
Symptoms
Small, dark brown spots on foliage. Infected tissue gradually dies off. Raised area on buds, bud rotting, deformed development on opened flower grey, watery, round spots.
Control
Keep crop dry by adjusting plant density Weed control Irrigation in morning Alternate spraying captaf @ 2gm+Bavistin @ 2gm per lit.
OR
Bavistin @ 2gm + Dithane M45 @ 2gm per lit.
- Always harvest the lilies at the cutting stage, i.e. 8-10 cm above the ground when lower first bud shows the colour of flower.
- Prevent the stems drying out during & after harvesting.
- After harvesting, stems are graded according to number of flower buds per stem, length & firmness of stem.
- During bunching, remove 10 cm of foliage from the end of the stems & subsequently sleeve the flowers.
- Immediately after bunching, the cut flowers should be placed in cold water in cold storage room at 2ºC to 3ºC. Add 2% sucrose and 100ppm GA3 as a preservative agent to water to improve vase life of flower.
- When dispatching lily flowers use only perforated boxes to maintain a proper temperature during transport.
Procedure for post harvest treatment of the bulbs:
- Reduce the frequency of irrigation water. Maintain soil moisture level in such a way that bulb scales should not dry out. Excessive moisture may lead to rotting of bulbs.
- Allow bulbs to remain in the beds for 4 to 5 weeks (above ground stem portion should dry out and can be pulled out from bulb easily).
- After 5 weeks remove the bulbs from soil along with dried stem.
- Remove dried stem carefully without damaging the bulb.
- Wash bulbs with clean water and treat with 2% Bavistin solution for 10 minutes.
- Remove the bulb from solution and air dry in shade. Too much drying may lead to loosen root skin. Such bulbs; after planting may develop root rot.
- Immediately after air drying pack the bulbs in plastic crates with moist coco peat wrapped with perforated plastic sleeves.
- Coco peat used for packing must be sterilized.
- Keep the crates in cold storage at 20C for 2 weeks and then at -10C for 6 weeks.
- Keep crates open for one day in cold storage and then close with plastic sleeves.
Input availability |
Address/Contact details |
| Seeds |
|
Fertilizers |
|
Pesticides |
|
| Machineries |
|
|